
Landing Pages
How to build and publish a landing page in Nashra: templates, the section builder and its library (Hero, Features, Benefits, Image, Embed, Stats, Pricing, Booking, Signup and more), buttons that stay off until they have a link, text formatting and alignment, pasting Markdown, image crop and links, icons, @ mentions, and the Agent that drafts and edits pages for you. Also covers Version history, editing a page in two places, the publish popover (purpose, On your Hub, Site menu, cover), where pages live, signups and tags, and analytics.
How landing pages work
A landing page is an ordered stack of pre-designed sections: a Hero at the top, maybe Features and Testimonials in the middle, a Signup form to close. You pick sections from a library, write your own words, add your images, and publish. Every section already looks designed, so you never face a blank canvas.
You can build a page yourself, or describe it to the Agent, which plans the page with you and writes the first draft. See The Agent.
Landing pages live at the root of your site, for example yourname.nashra.website/spring-launch. They use your brand color and fonts from Brand.
The Hub is your one home page. Landing pages are the focused, single-purpose pages you point people to. A published landing page can also show on your Hub as a card. See Purpose and your Hub.
Creating a landing page
Open the builder
In Library, click Create → Landing page. Building landing pages needs Automations access on your team role.
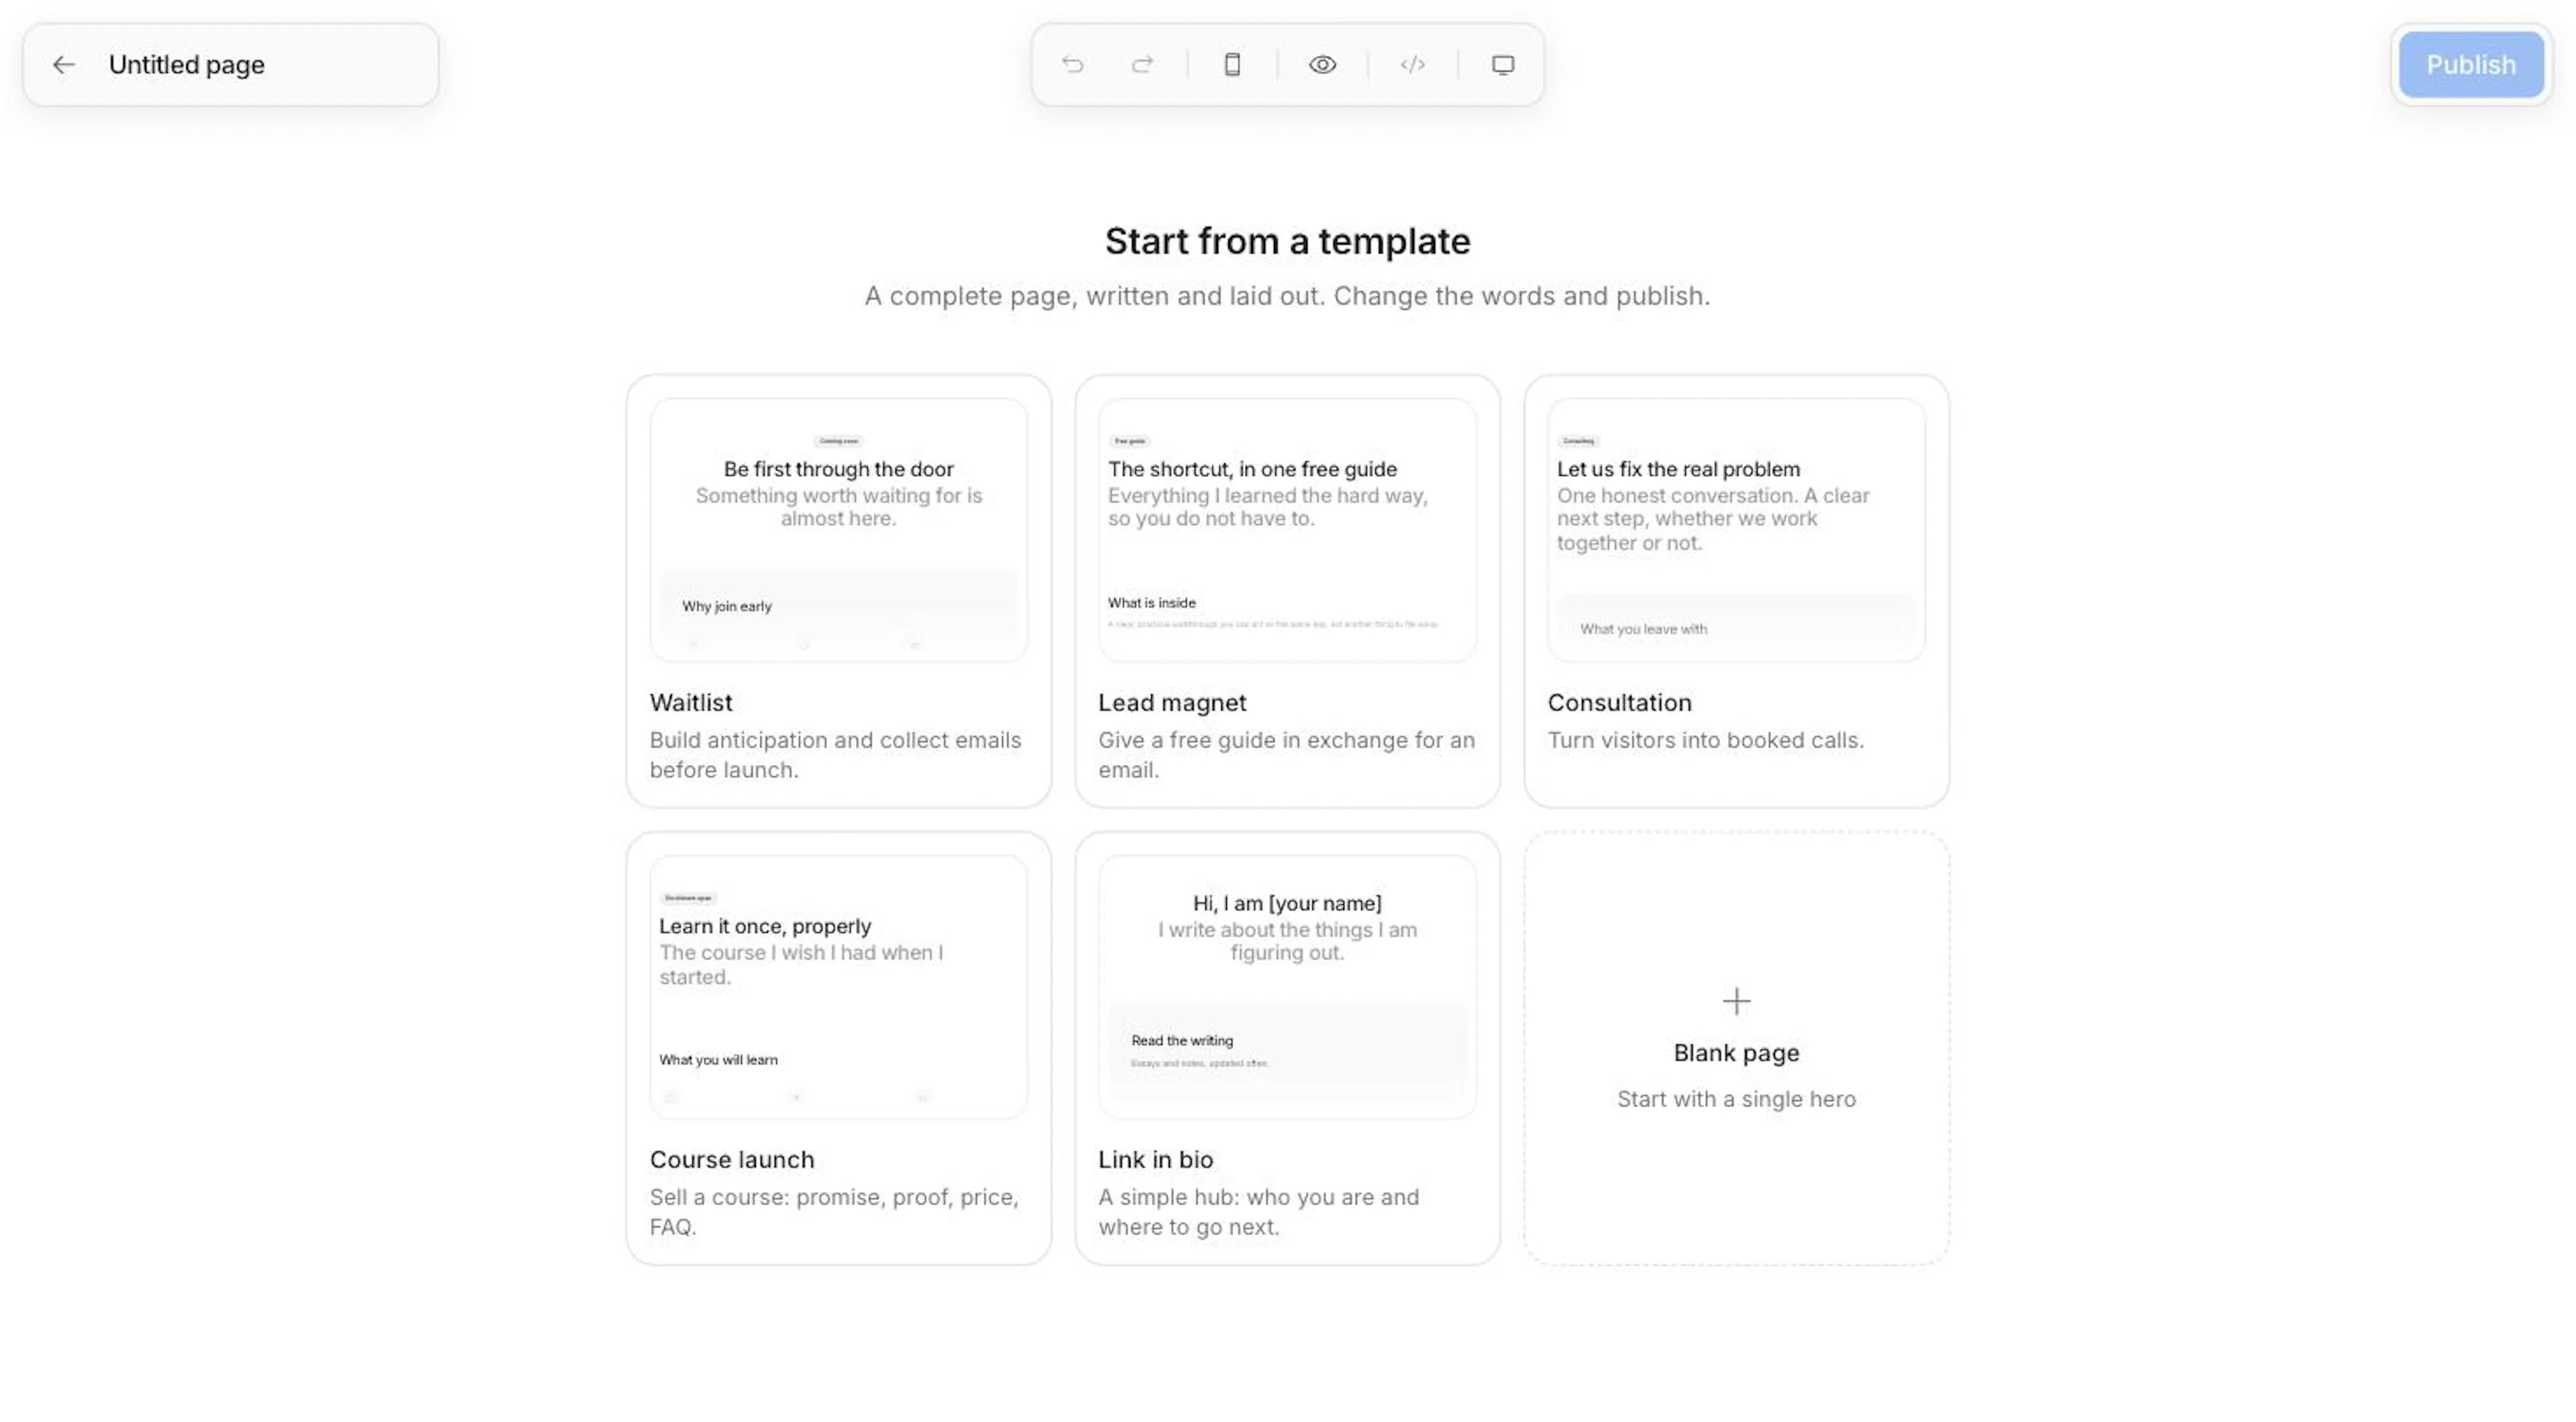
Pick a starting point
Choose one of five templates: Waitlist, Lead magnet, Consultation, Course launch, or Link in bio. Each one comes with the page already written and laid out. Or choose Blank page, which starts you with a single Hero.
Build with sections
Add, reorder, and edit sections until the page says what you need. Use the Blocks tab yourself or ask the Agent. See Sections.
Publish
Click Publish and check the details Nashra filled in from your page. See Publishing.
Every change saves automatically about 700ms after you stop typing. A new page isn't added to your Library until you put something on it, so if you close an untouched draft, nothing is saved.
The builder
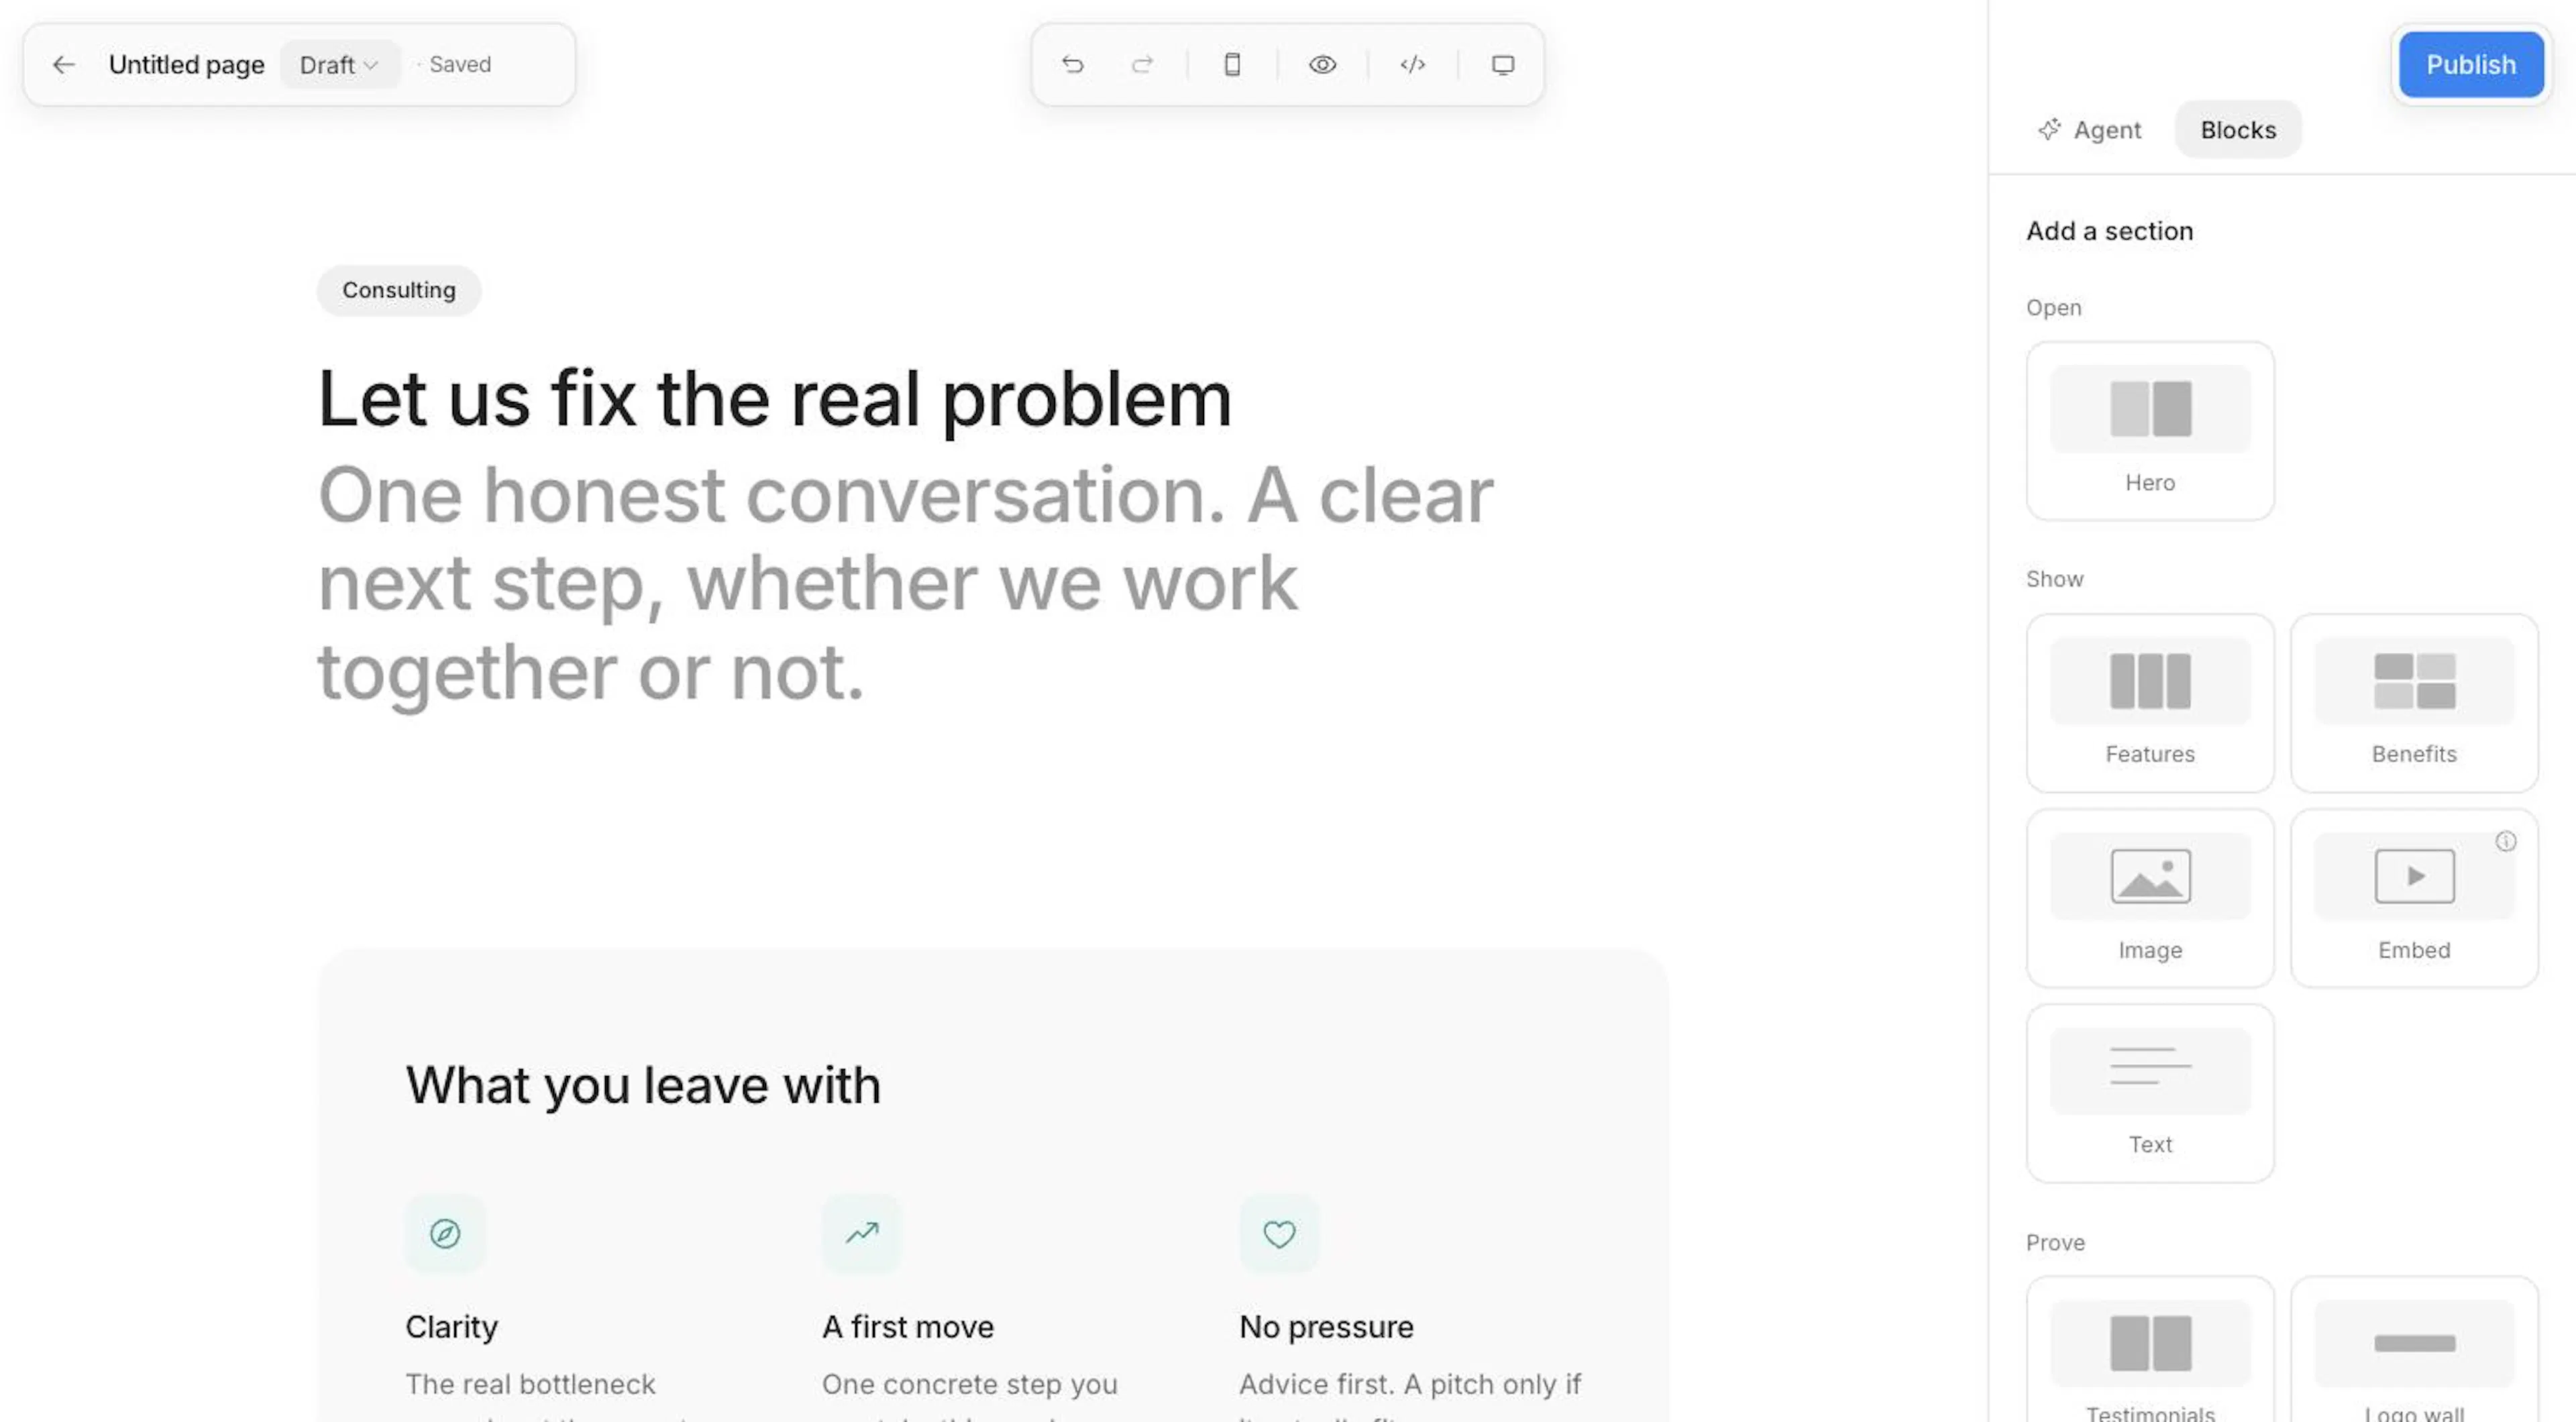
The canvas shows your page as readers will see it. The rail on the right has two tabs:
- Blocks is the section library. Click a tile to add that section.
- Agent is the AI chat that builds and edits the page with you.
Click a section to select it. Its settings then take over the rail. Hover between two sections and click Add section to insert one at that exact spot.
The top bar shows the page's title, its save status, and a Published / Draft status pill. The title is the one you set when you publish; before that, it's the page's name. The middle controls are Version history, Undo, Redo, a mobile preview toggle (on larger screens), Preview (closes the rail so you see exactly what a reader sees), and Tracking code. Once the page is live, you also get Analytics and a View link with a copy button.
| Shortcut | What it does |
|---|---|
| ⌘Z / ⇧⌘Z (Ctrl on Windows) | Undo / redo any change, including one the Agent made |
| ↑ / ↓ | Select the previous or next section |
| ⌥↑ / ⌥↓ (Alt on Windows) | Move the selected section up or down |
| ⌘D | Duplicate the selected section |
| Delete | Remove the selected section (the toast has an Undo) |
| Esc | Deselect and go back to the library |
Shortcuts don't fire while you're typing in a text field.
Version history
Every time something replaces your draft, Nashra keeps the draft it replaced. Click Version history (the clock icon) in the top bar to see them, newest first, each with when it was saved, who saved it, and a label: Autosaved (kept about every 10 minutes while you edit), Before AI edit, Before restore, Unsaved copy (your copy from a save turned away because the page had changed elsewhere), or Published (what went live each time you published).
Click Restore on a version, then Confirm. It becomes your draft, and ⌘Z brings back what you had. Restoring doesn't touch the live page: it stays as it is until you publish again.
Editing in two places
If the page changes somewhere else while it's open (another tab, a teammate, or the Agent), the builder picks it up within about ten seconds, or when you come back to the tab. With nothing unsaved, the newer version appears with a note such as Updated from another window. If you have an edit that hasn't saved yet, you'll see This page changed while you were writing and choose Keep mine or Show latest. The version you don't keep stays in Version history.
Sections
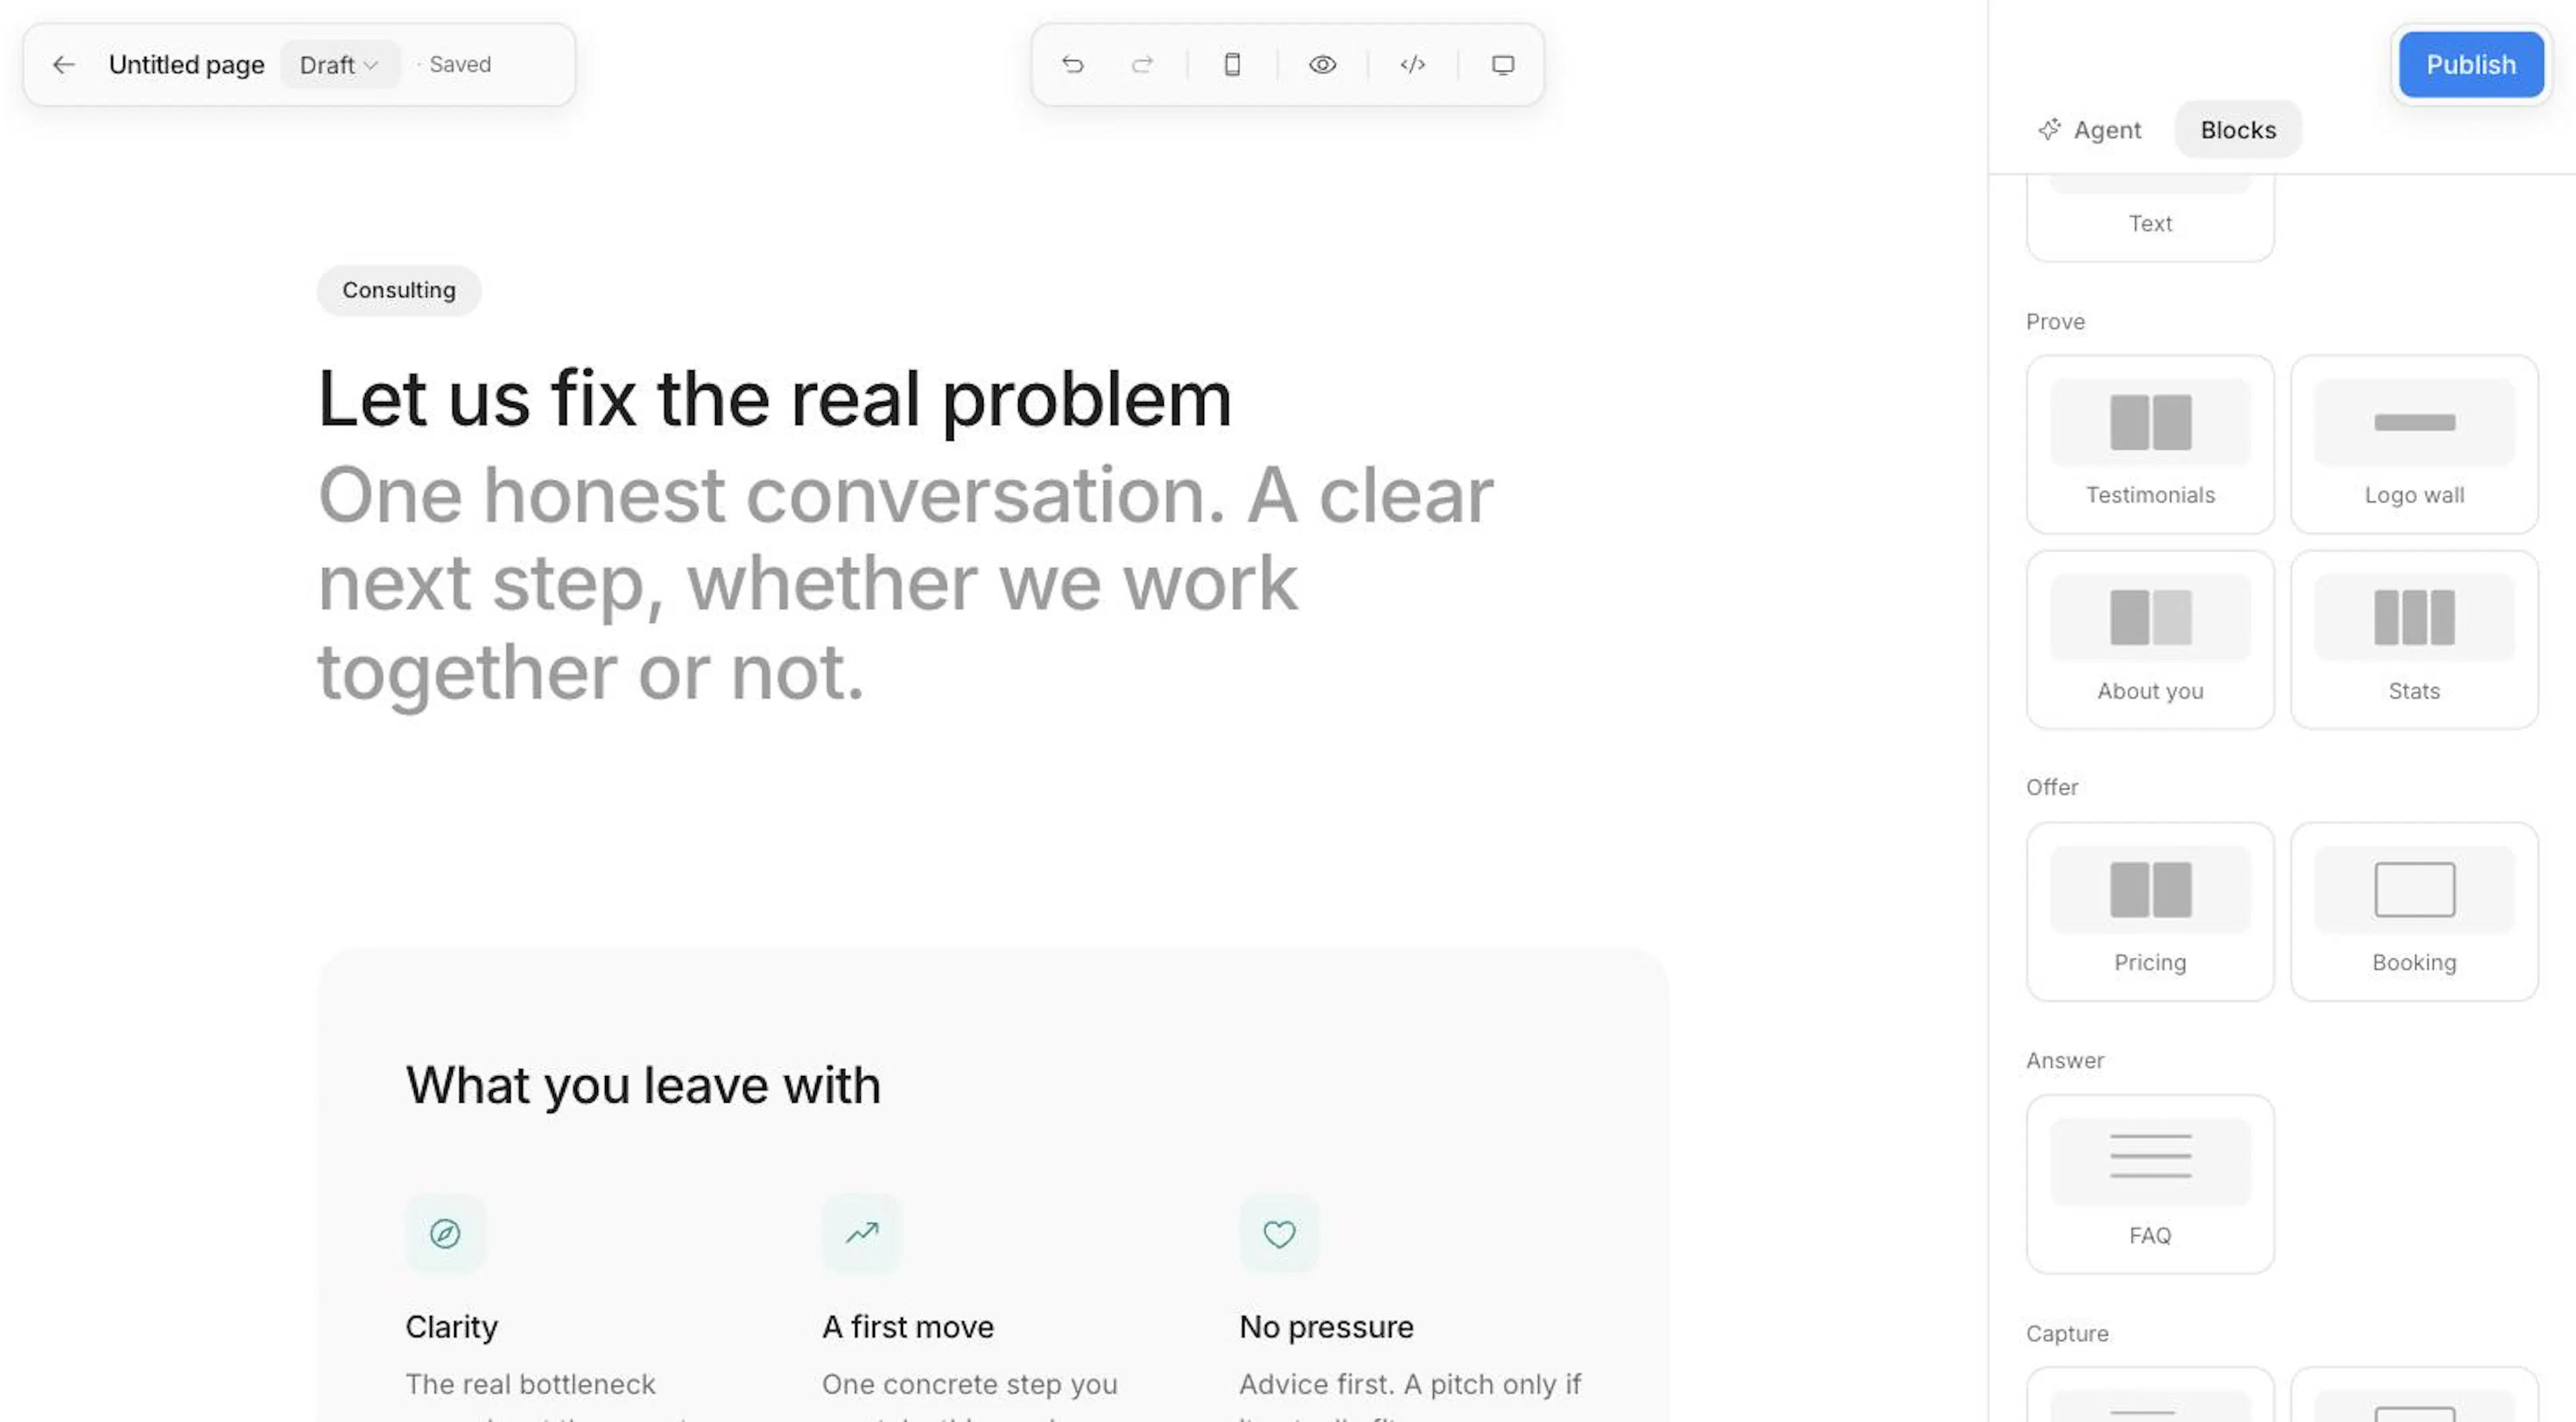
The Add a section library in the Blocks tab groups sections by the job they do in a reader's journey:
| Group | Section | Layouts |
|---|---|---|
| Open | Hero | With image, Centered, Aligned start |
| Show | Features | 3 columns, 2 columns, Rows |
| Benefits | Zigzag, Straight, Tabs, Sticky scroll | |
| Image | Full width, Inset, 3 across, 2 across, Slideshow | |
| Embed | Full width, Inset | |
| Text | Prose | |
| Prove | Testimonials | 2 columns, 3 columns, One quote |
| Logo wall | Row, Marquee | |
| About you | Photo beside, Centered | |
| Stats | 3 across, 4 across, 2 across | |
| Offer | Pricing | 2 columns, 3 columns, One package |
| Booking | Card, Beside calendar, Calendar | |
| Answer | FAQ | List |
| Capture | Call to action | Aligned start, Centered |
| Signup | Boxed, Inline |
Three more sections don't have their own tile:
- Video and Podcast arrive through Embed. Paste a YouTube or Vimeo link and the section becomes a Video. Paste an Apple Podcasts or Spotify episode and it becomes a Podcast card with the episode's title and artwork.
- Mentions appears on its own the first time you @-mention another publisher. See Mentioning other publishers.
The Signup section is the spine of the page. If your page doesn't have one yet, the library shows a No signup on this page yet note that adds one in a click.
A page holds up to 60 sections.
Section settings
Select a section and the rail shows:
- Layout: switch between the layouts above. Your words carry across when you switch.
- Elements: switches for the section's optional parts, such as an eyebrow, a heading, a second button, captions, or a photo. Switching a part off hides it and frees its space, but keeps its words, so switching it back on brings them back. New sections start with only the essentials.
- Options: the choices that section offers, like icon placement on Features or auto-advance on a slideshow. Most sections also have a Surface option: None, Card, or Brand color. Sections whose items are already cards (Testimonials, Pricing) skip Card.
- Arrange: move up, move down, duplicate, or delete.
A Brand color section fills with your brand color and works out its own readable text. Nashra measures the color and picks text, muted text, and button colors that stay readable on it. A mid-tone brand color keeps white button labels by deepening the fill slightly. Only a very pale color switches to dark text.
What each section holds
- Features: a grid of short points, each with an icon. Click an icon to change it. You can search the full Phosphor icon set in English or Arabic, so typing قلب, فلوس, or جوال finds heart, money, or phone icons. Icons sets them On top, Inline, or None.
- Benefits: points with a picture beside each one. Tabs puts the points behind a tab bar, and each tab has its own short label (it falls back to the point's heading if you leave it empty). Sticky scroll pins each step's image as the reader scrolls the published page. Switch Buttons on to give every point its own button.
- Image: one picture or several. Full width and Inset show one picture. The grids show them all, and Slideshow shows one at a time, with Auto-advance. Switch Captions on for a line under each picture.
- Embed: paste a link or an embed code from Loom, Typeform, Google Maps, Google Forms, Docs or Calendar, Notion, Airtable, or Spotify. Height is Compact, Standard, or Tall. YouTube, Vimeo, and podcast links turn into their own sections, as described above.
- Video: a YouTube or Vimeo link only. You can't upload your own video file.
- Text: longer prose, with headings and lists. See Text and formatting.
- Testimonials: quotes with a name and a role line.
- Logo wall: each logo shows as its name (a text wordmark) until you add its image. Add logos with Upload images (several at once) or Add name. Each logo's settings let you change its image, name (also used as its alt text), link, and a small Size adjustment, so a thin wordmark and a heavy monogram look balanced. For the whole wall, Size is Small, Medium, or Large, and Color is Grayscale or Original colors.
- About you: your photo, name, what you do, a few lines about you, and up to two buttons.
- Stats: figures with a short label, like "2,000+ subscribers" or "4.9/5 average rating".
- Pricing: packages with a name, price, description, checklist, footnote, and button.
- Booking: paste a Calendly, Cal.com, or SavvyCal link. Card and Beside calendar sell the call first, with optional Details (like "30 min"), What you'll cover, and a Photo. Calendar puts the scheduler straight on the page. With Ask for email first on (the default on the Card and Beside calendar layouts), readers give their name and email before they pick a time. They join your audience, the scheduler opens with their details filled in, and the booking shows as Booked a call on their journey. Tag on signup tags everyone who books this way.
- FAQ: questions and answers.
- Call to action: a closing heading, a line of body text, and up to two buttons.
- Signup: the subscribe form. Ask for name adds a name field. Ask for WhatsApp number adds an optional number field. Readers can leave it blank and still subscribe. Tag on signup tags every subscriber from this page, for example
course-waitlist. Edit the button label and email placeholder right on the canvas.
Buttons
A button is off until it has a link. New sections, templates, and sections the Agent adds all start with their buttons switched off. To add one, switch it on under Elements (for example Button or Second button), then give it a destination.
Click the link badge on a button to set its destination:
- Paste any URL, or search your published posts, landing pages, and resources.
- Pick a section On this page to scroll the reader there, for example to your Signup form.
- Open the ⋯ menu to set Style (Primary or Secondary), Remove link, or Remove button.
On Pricing and Benefits, one Buttons switch shows or hides the buttons on every package or point. You can also remove a single package's button and add it back with the Button placeholder.
A button that's switched on but has no link shows a warning badge on the canvas and a note in the rail. It won't appear on the published page, and the publish popover lists it by name before you go live.
Text and formatting
Headings, labels, and prices are plain text. Body text and other prose fields support Bold, Italic, and Link from the floating toolbar that appears when you select text. Links can go to any URL or to one of your pages.
The Text section also has Paragraph, Heading, Subheading, Bulleted list, and Numbered list in the same toolbar, plus one Text alignment button. Each click moves the selected paragraphs and headings from start to center to end, and back to start. Lists don't take alignment, so the button hides when only a list is selected.
Pasting Markdown. Drafted your text in Markdown? Paste it into a Text section and headings, lists, bold, italic, and links arrive as real formatting. In plain fields like headings, labels, and prices, the words come through without the Markdown symbols.
Pages made with Nashra's older landing editor open in the builder with their content in a Text section. Anything that section can't edit shows a note and publishes unchanged.
Images
Every image on a page, whether it's in a Hero, a benefit row, a slideshow, a tab, the Image section, About you, or a Booking card, has the same controls.
Click an empty image to open the image picker. Upload your own file, or search stock photos on Unsplash (filter by orientation, color, and sort order) or Lummi (filter by Photos, Illustrations, or 3D, and by orientation). Stock tabs appear only where stock search is available.
Hover a placed image for:
- Adjust: Aspect ratio (Auto, 16:9, 4:3, 1:1, or 3:4), Focal point (drag the point you want to keep in frame; this appears once the image is cropped), and Alt text.
- Link: make the picture itself clickable, to a URL or a section on this page.
- Replace keeps your crop and link. ✕ removes the image.
An image you haven't adjusted uses the shape its section was designed for.
Mentioning other publishers
Type @ followed by at least three letters in any body text to mention another publisher on Nashra. Only publishers with a published Hub can be found. The mention becomes a chip that links to them.
The first mention adds a Mentioned on this page section, with a card for each publisher you mention. It updates as you add or remove mentions. If you remove a card by hand, it stays removed. When you publish, each publisher you mentioned gets one notification per page.
The Agent
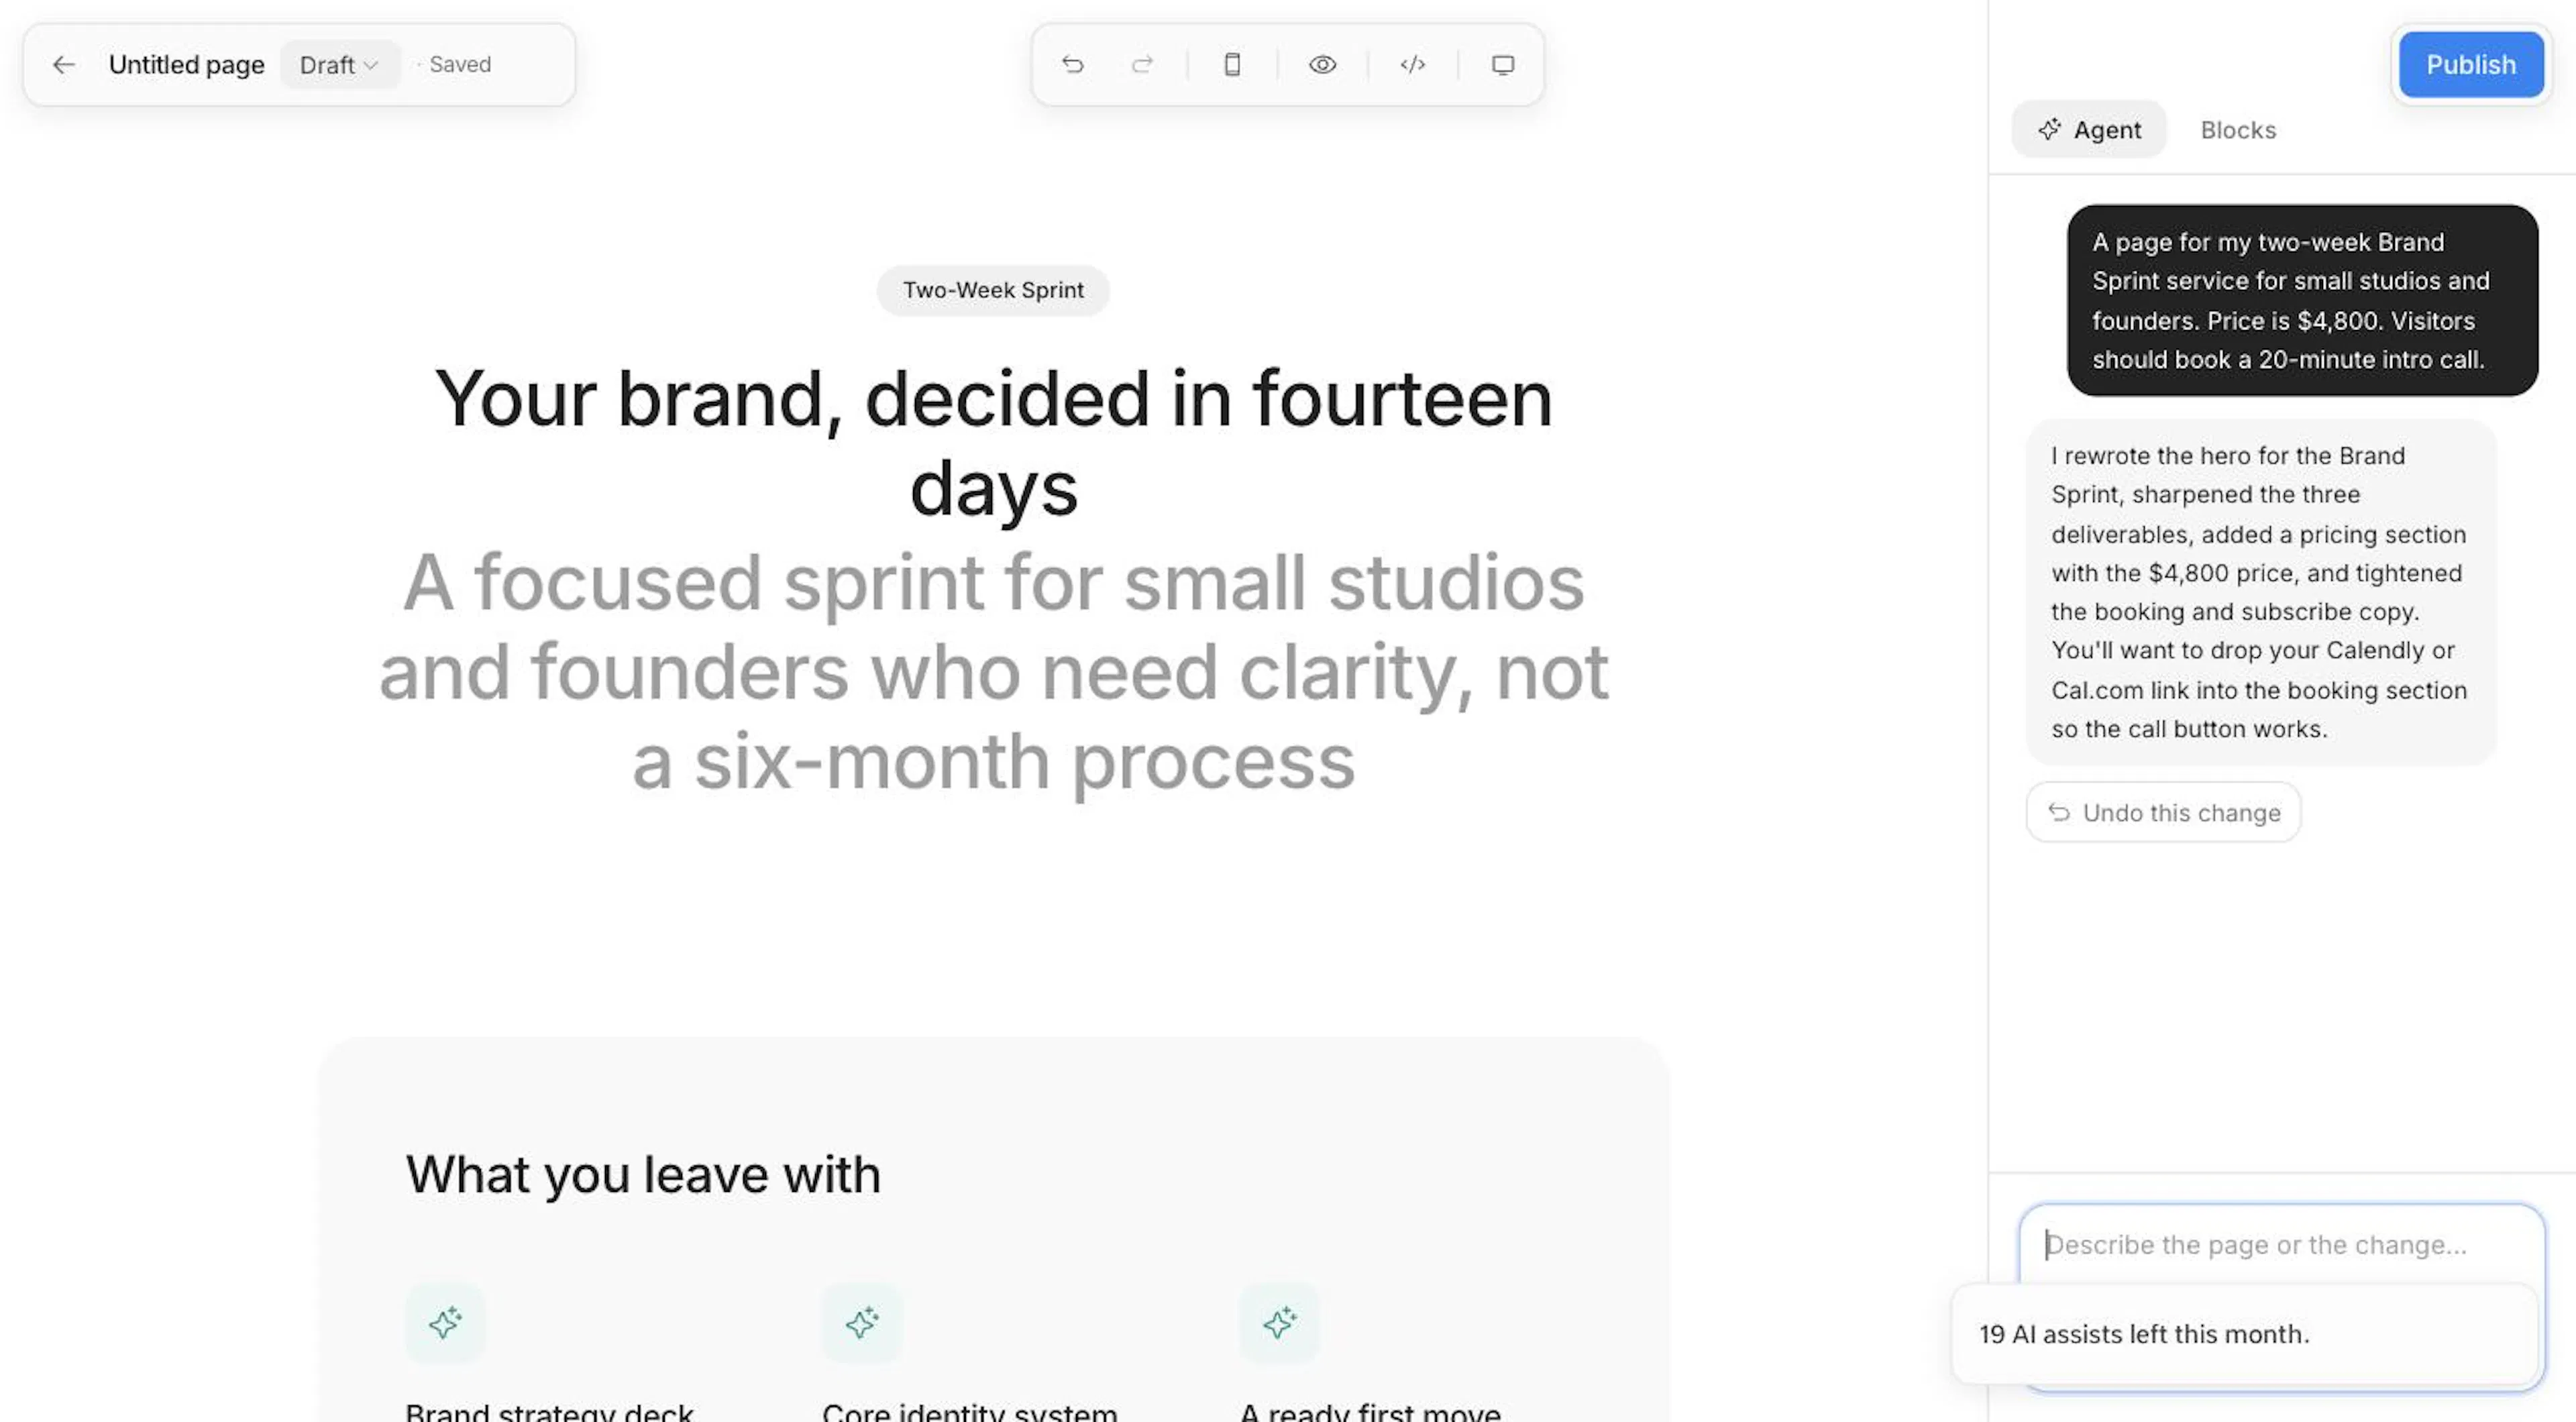
The Agent tab is an AI that designs the page with you. It reads the sections already on the page, then adds, rewrites, removes, or reorders them to match what you ask. Type in Describe the page or the change…, or start from a suggestion:
- "Draft a launch page for my new offer"
- "Tighten all the copy on this page"
- "Add a pricing section with two packages"
Enter sends. Shift+Enter adds a new line.
Building a whole page
Describe the page
On an empty page, tell the Agent what the page is for, who it's for, and the one thing readers should do. If your brief is too thin, it asks for the two or three facts it needs instead of filling the page with placeholder copy.
Review the plan
Before it writes anything, the Agent proposes the page as a numbered list of sections, each with a line on what it does for the reader. Hover a step and click ✕ to drop it.
Build it
Click Build this page. The Agent writes that exact list, in that order.
On a page that already has sections, the Agent makes the smallest change that does what you asked. It doesn't re-plan or rebuild the page.
How the Agent writes
- Length follows your brief. Ask for something "short", "simple", or "concise" and you get three sections: a Hero, one section that shows or proves, and a Signup (or a call to action). With no length given, you get four to six. Ask for "full" or "detailed" and you get six to eight.
- Layouts follow the content. Parallel points become Features, a before-and-after or case study becomes Benefits, real numbers become Stats, and a single quote uses the One quote layout. Column counts match the number of items, so three features get 3 columns. A Hero with no image to show opens Centered.
- Copy stays tight. One idea per field, within short word limits, in plain text. Buttons name the action, like "Book the intro call", never "Submit".
- Only your real details. It won't invent prices, testimonials, numbers, dates, or links. It writes in your workspace's content language (or Arabic, if you write to it in Arabic), and it matches your voice and audience. See Nashra AI.
- Sections it adds start empty. Each one holds only the words the Agent wrote, with no leftover starter copy. Any field it had nothing for stays blank for you to fill in.
- Buttons only get real links. It links a button to one of your live posts, landing pages, or resources, or to the page's own Signup section. When nothing fits, the button stays off for you to link.
- It suggests images but doesn't pick them. An empty image slot the Agent filled in shows a suggested search, marked with a sparkle. Click it to open the image picker already searching for that term. If the Agent rewrites a section's items, images you've already placed stay.
The Agent can't choose or upload images, change your fonts, colors, or spacing, set the page's title, slug, or SEO fields, or build the Mentions section. Ask for one of these and it tells you so instead of changing the page.
While it works
While the Agent writes, the canvas is covered so your edits don't get overwritten. Publish and Preview wait until it's done. Click Stop designing to call it off, and your instruction goes back into the box.
Each change the Agent makes shows an Undo this change button. Only the latest change can be undone this way, but the toolbar Undo and ⌘Z step back through Agent changes like any other edit.
If a request fails, the error has a Retry link. A whole page can occasionally take longer than the connection allows. If that happens, build from an approved plan or ask for one section at a time.
Each request the Agent answers uses one AI assist from your monthly allowance. See Nashra AI. The Agent is also limited to 30 requests per minute per person.
Publishing
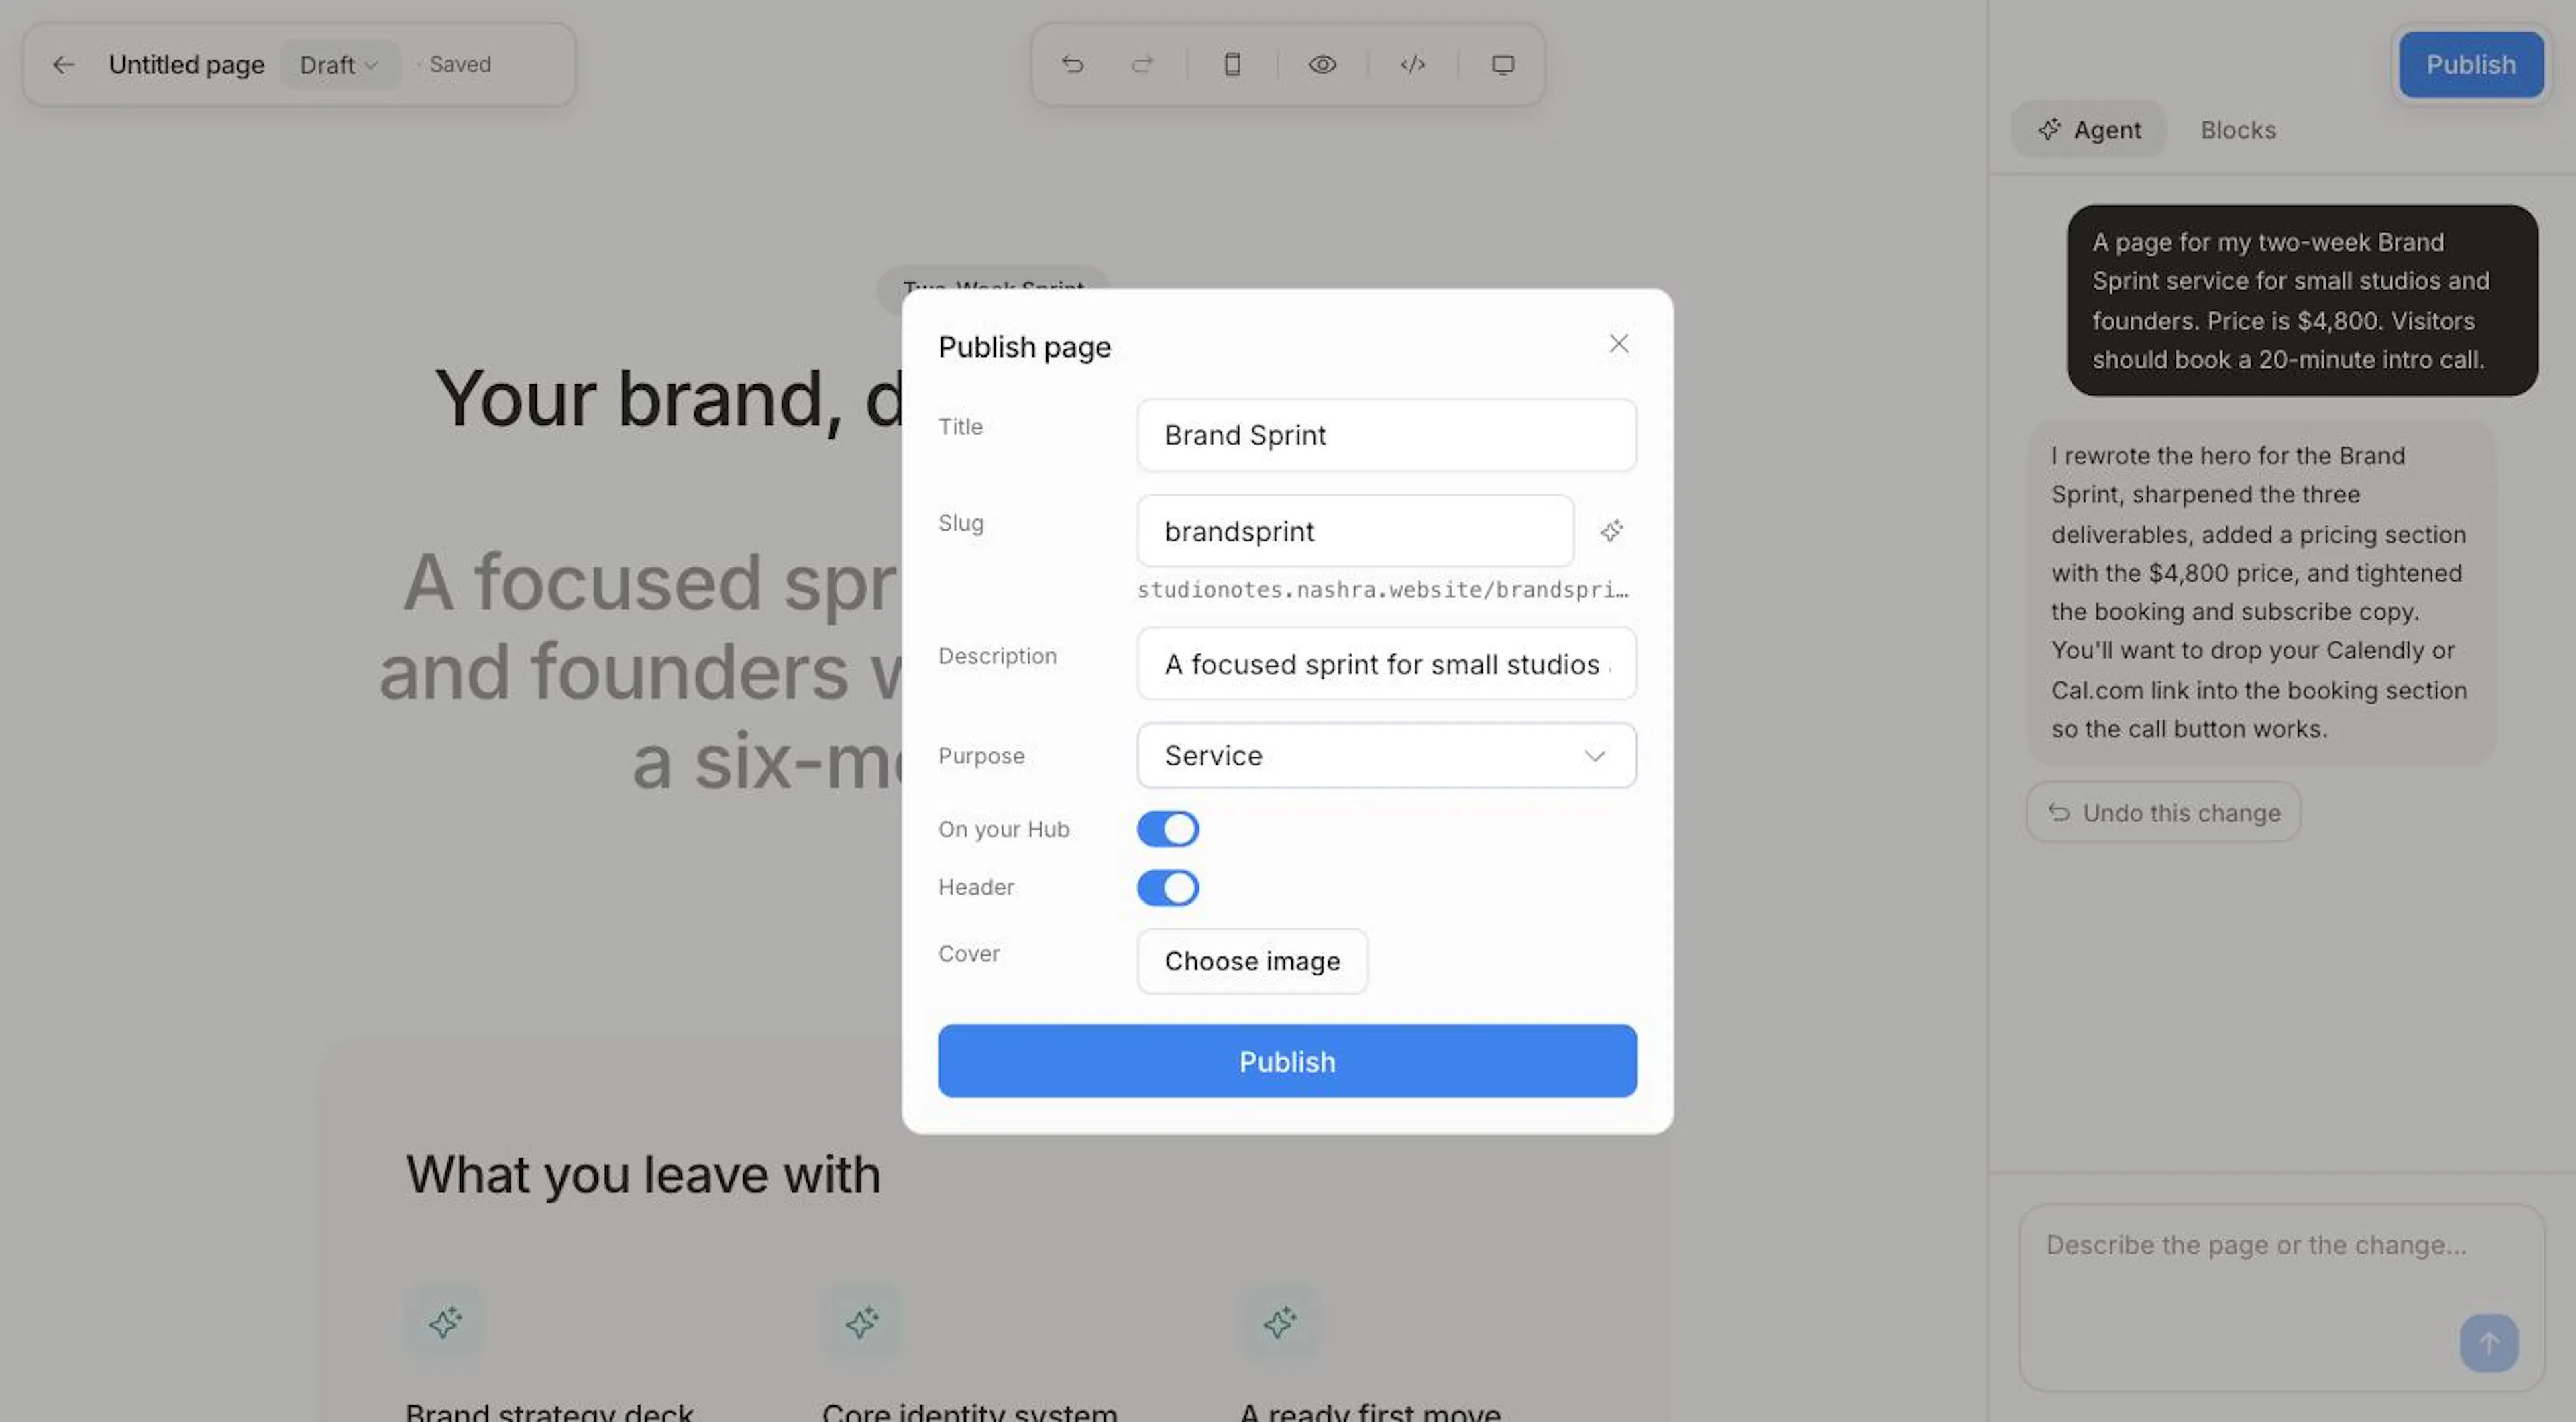
Click Publish in the top right. The button stays disabled until the page has something on it. The popover fills itself in from your page: the page's main heading becomes the Title, the first paragraph under it becomes the Description, and the first image becomes the Cover. Anything you've already saved stays as it is.
- Title
- Slug: translated from your title as you type. Arabic titles are translated, not transliterated. Edit it yourself, or click the sparkle to regenerate it. Once a page is live, its slug no longer follows the title, so its URL never changes without you editing it. A slug of
homemakes the page your site's root. - Description: the meta description shown in search results.
- Purpose: Page, Service, Product, or Event. See Purpose and your Hub.
- On your Hub: whether this page appears on your Hub.
- Site menu: on by default, so the page shows your site's header and navigation. Switch it off for a focused page that keeps only your logo.
- Cover: the image shown when the page is shared and on its Hub card. It defaults to the first image on your page. Choose image or Replace sets a different one, and Remove goes back to the page's own image.
Once the page is live, the button says Update. Click it to push your latest edits live.
To take a page offline without deleting it, open the status pill in the top bar and choose Draft. Choosing Published on a draft opens the publish popover.
Every plan can publish landing pages. Free and Newsletter publish on your Nashra subdomain with a small Nashra badge. Publisher removes the badge and lets you publish on a custom domain. See Plans & Billing.
Purpose and your Hub
Purpose says what the page is for. It decides where the page sits on your Hub:
| Purpose | On your Hub by default | Where it shows |
|---|---|---|
| Page | No | As a card, if you switch On your Hub on |
| Service | Yes | In your Hub's Services section |
| Product | Yes | In your Hub's Products section |
| Event | Yes | In your Hub's Events section |
Until you touch On your Hub, it follows the purpose. Once you set it yourself, your choice sticks, even if you change the purpose later. A page that's off your Hub is still live at its URL. It just isn't listed on your Hub.
Signups, tags, and automations
When you publish a page with a Signup section (or a Booking section with Ask for email first), Nashra records that page as the source of every signup it collects. Every tag set on the page's Signup and Booking sections is applied to each person who signs up there.
That's what lets you:
- Trigger an automation when someone subscribes from this specific page.
- Segment your subscribers by the tags the page applied.
Where landing pages live
Published pages sit at the root of your site: yourname.nashra.website/{slug}, or your custom domain on Publisher.
Your posts and landing pages share that space, so a landing page can't use a slug that another landing page or a post already has. Some slugs are also reserved for Nashra's own routes, such as blog, subscribe, resources, feed, and sitemap. Slugs use lowercase letters, numbers, and hyphens.
Language and direction
A landing page takes its language and text direction from your workspace's content language when you create it (Settings → General → Language & region). An Arabic workspace gets right-to-left pages, with starter copy and placeholders in Arabic. The page keeps that language, so pages you made before changing your workspace language stay as they were.
Pasting can switch it. Paste English into an Arabic page (or the other way round) and, once the page as a whole reads in that language, the page turns to match: direction and language. A note says Page switched to left-to-right (or right-to-left) and offers Undo, after which the page stays as you set it. A short paste, like a name, a price, or a link, never switches it. In a Text section, each paragraph also sets its own direction, so an English paragraph on an Arabic page still reads left to right.
Tracking code
Click Tracking code in the builder toolbar to add snippets, such as a pixel or a verification tag, to this page's head only. Site-wide tracking lives in Settings → Integrations. See Tracking & Pixels.
Managing pages in the Library
In Library, filter to landing pages to see them all. Each row's menu has View page, Copy link, Status (Published or Draft), Duplicate, and Delete. Select several rows to change their status or delete them at once. Pages with nothing on them are skipped when you publish in bulk.
Duplicate a page when you want to reuse its structure, like for a seasonal launch. The copy opens in the builder. Deleting a landing page is permanent.
Analytics
A landing page's numbers live in Insights. Click the page in the Content tab to open its analytics panel, which uses the date range you've picked in Insights. Once a page is live, the builder toolbar also shows an Analytics button that opens the same panel. Drafts don't have one.