
Sending Newsletters
How to send a post as an email — the card-on-file requirement for sending, the Send email dialog (subject with AI suggestions, preview text, sender, audience, send now or schedule at a recommended time), test emails, A/B testing subject lines, cancelling a scheduled send, sending a post again, resending to non-openers as a new post, what the email looks like (masthead, send date, Read online), and removing Nashra branding.
How sending works
In Nashra, every email send is a campaign, and a campaign is made from a post. You can send the same post more than once, for example to one segment on Monday and another on Thursday. Each send gets its own report.
Sending and publishing are independent actions, each with its own button in the post editor's top bar. Send email never publishes the post, and Publish never sends it. Do one, the other, or both, in either order. See Publishing Posts.
Nashra handles delivery, queuing, and sender reputation behind the scenes.
Before your first send: add a card
To send email to your audience, a workspace needs a paid plan or a card on file. The card isn't charged and your plan doesn't change. It's how Nashra confirms you're a real sender, which keeps spam off the sending infrastructure your emails share.
The first time you click Send email without one, Nashra asks you to Add a card or Upgrade plan. Once a card is added, the send dialog opens and you can carry on.
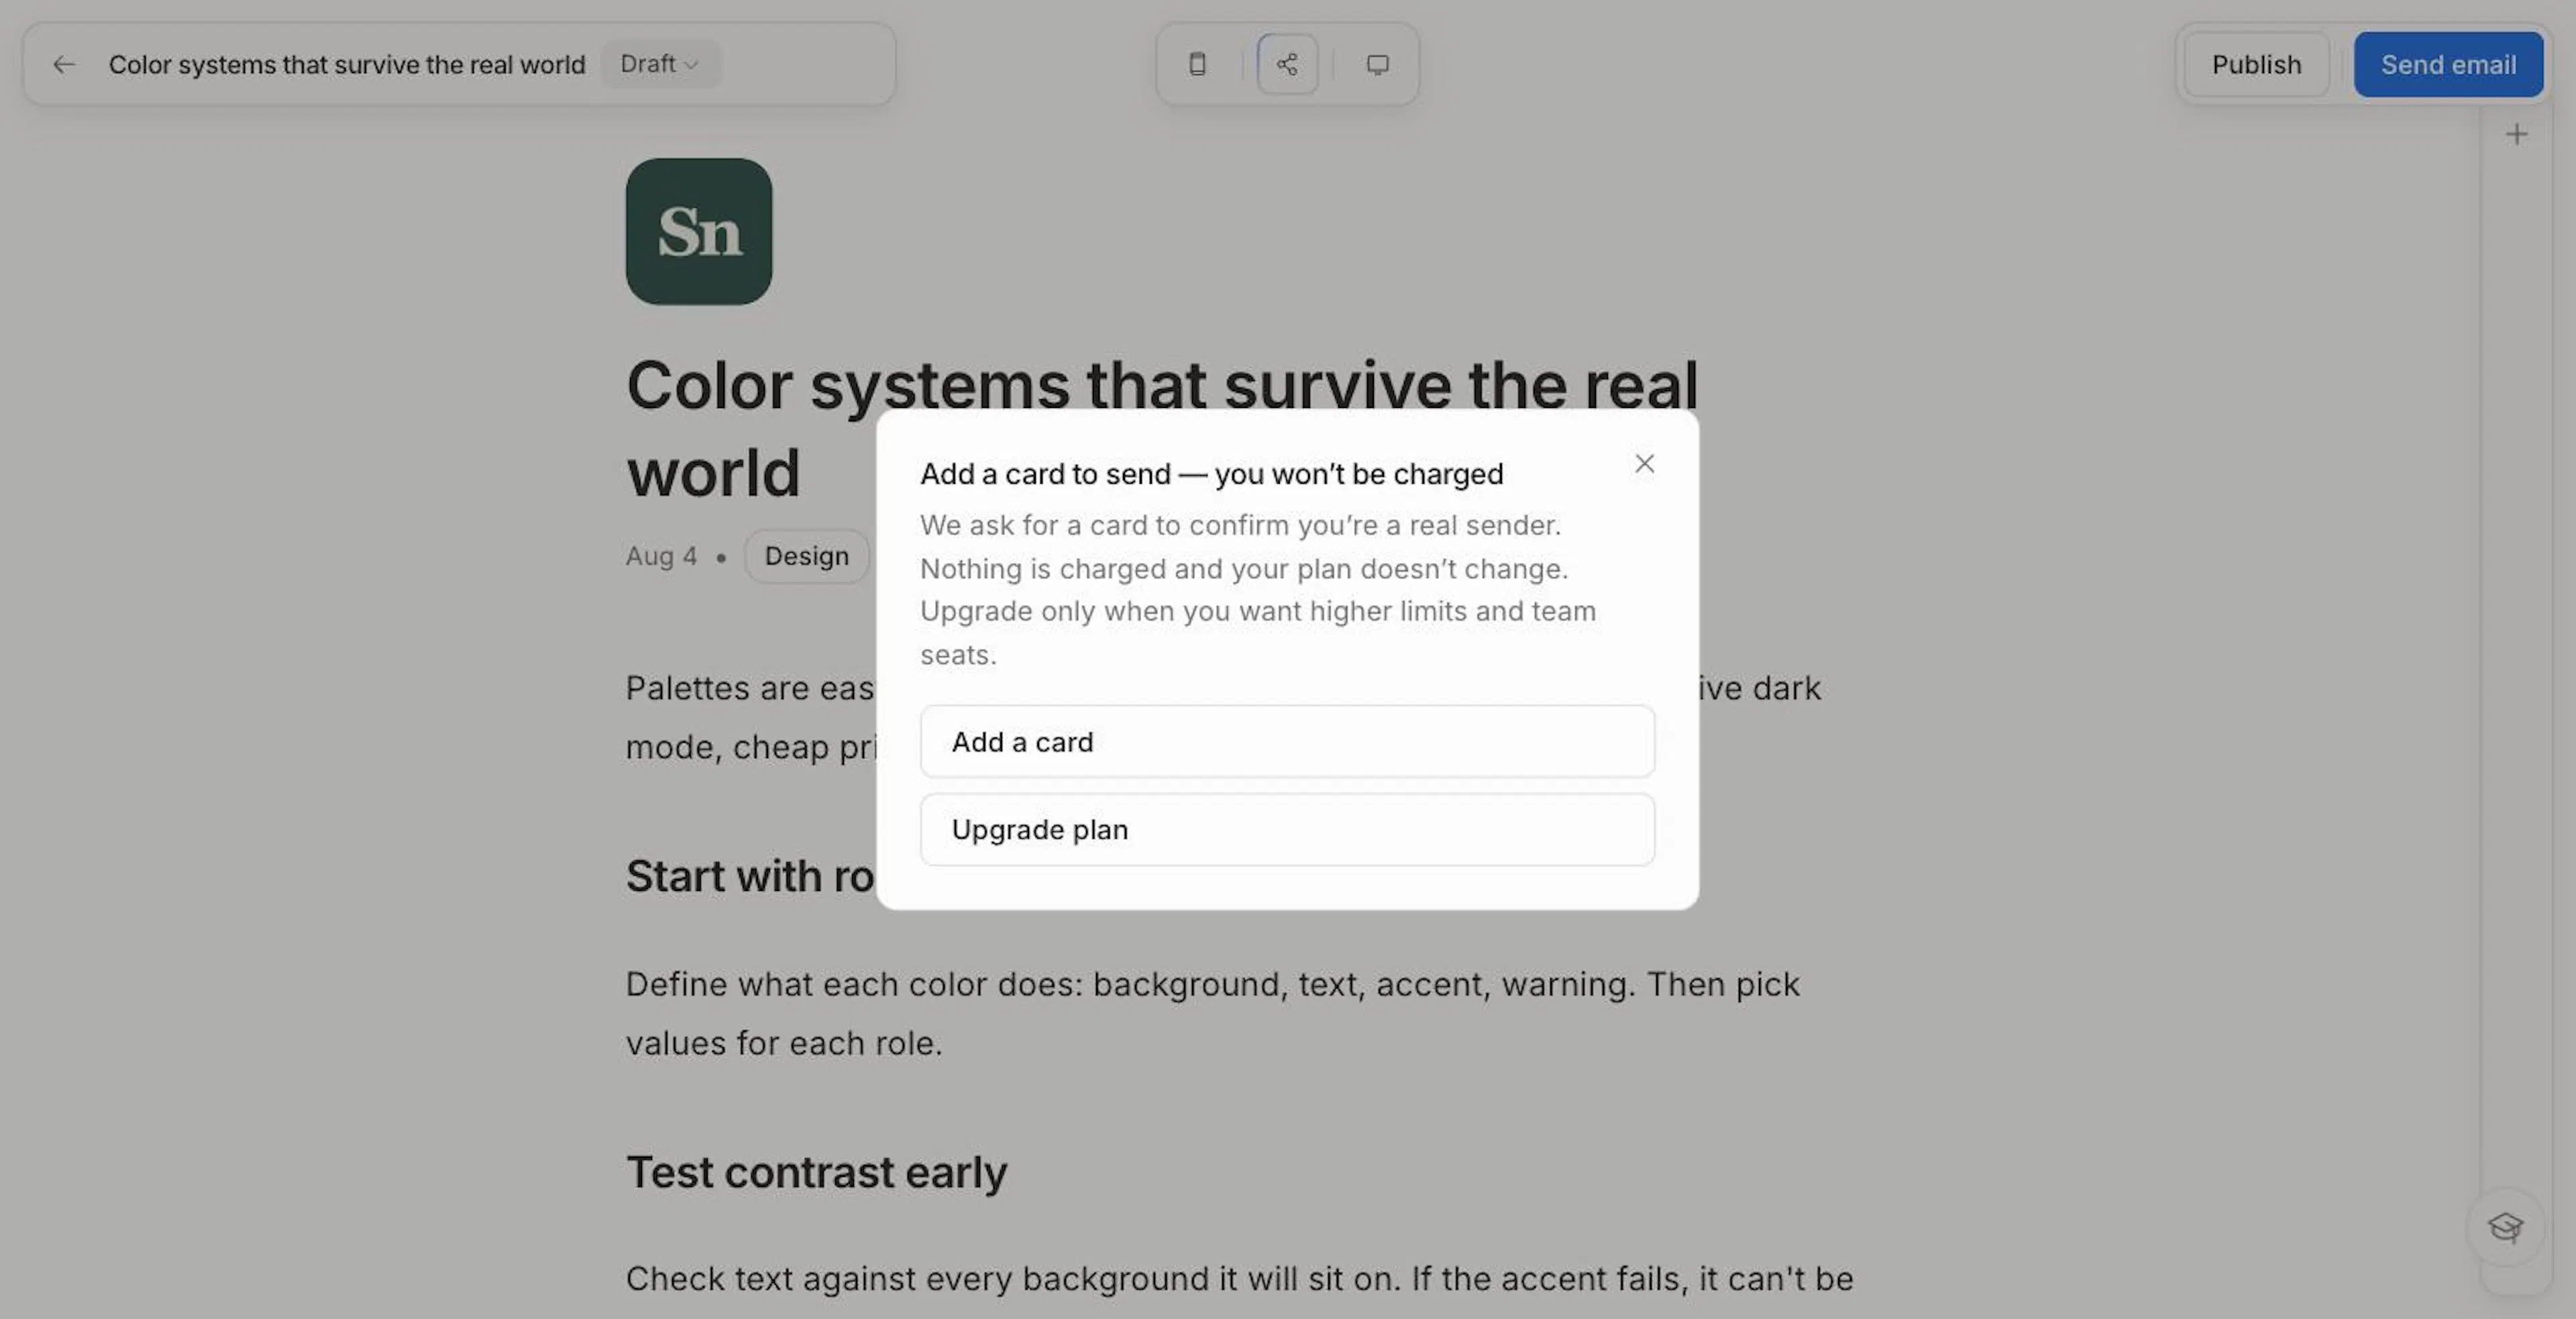
The same rule covers every email you write and send to your audience:
- Posts, whether you send from the editor, the API, or a connected AI assistant.
- Automations, which won't switch on or send without it.
- Resource follow-up emails. While the workspace has no card or paid plan, follow-ups wait instead of sending, and the owner gets one email saying they're paused. Add a card or upgrade and everything waiting goes out automatically. There's nothing to re-send by hand.
Publishing posts, landing pages, and your Hub to the web never needs a card.
Sending an email
Click Send email
In the post editor's top bar, click Send email. The post needs a title, and your account email needs to be verified.
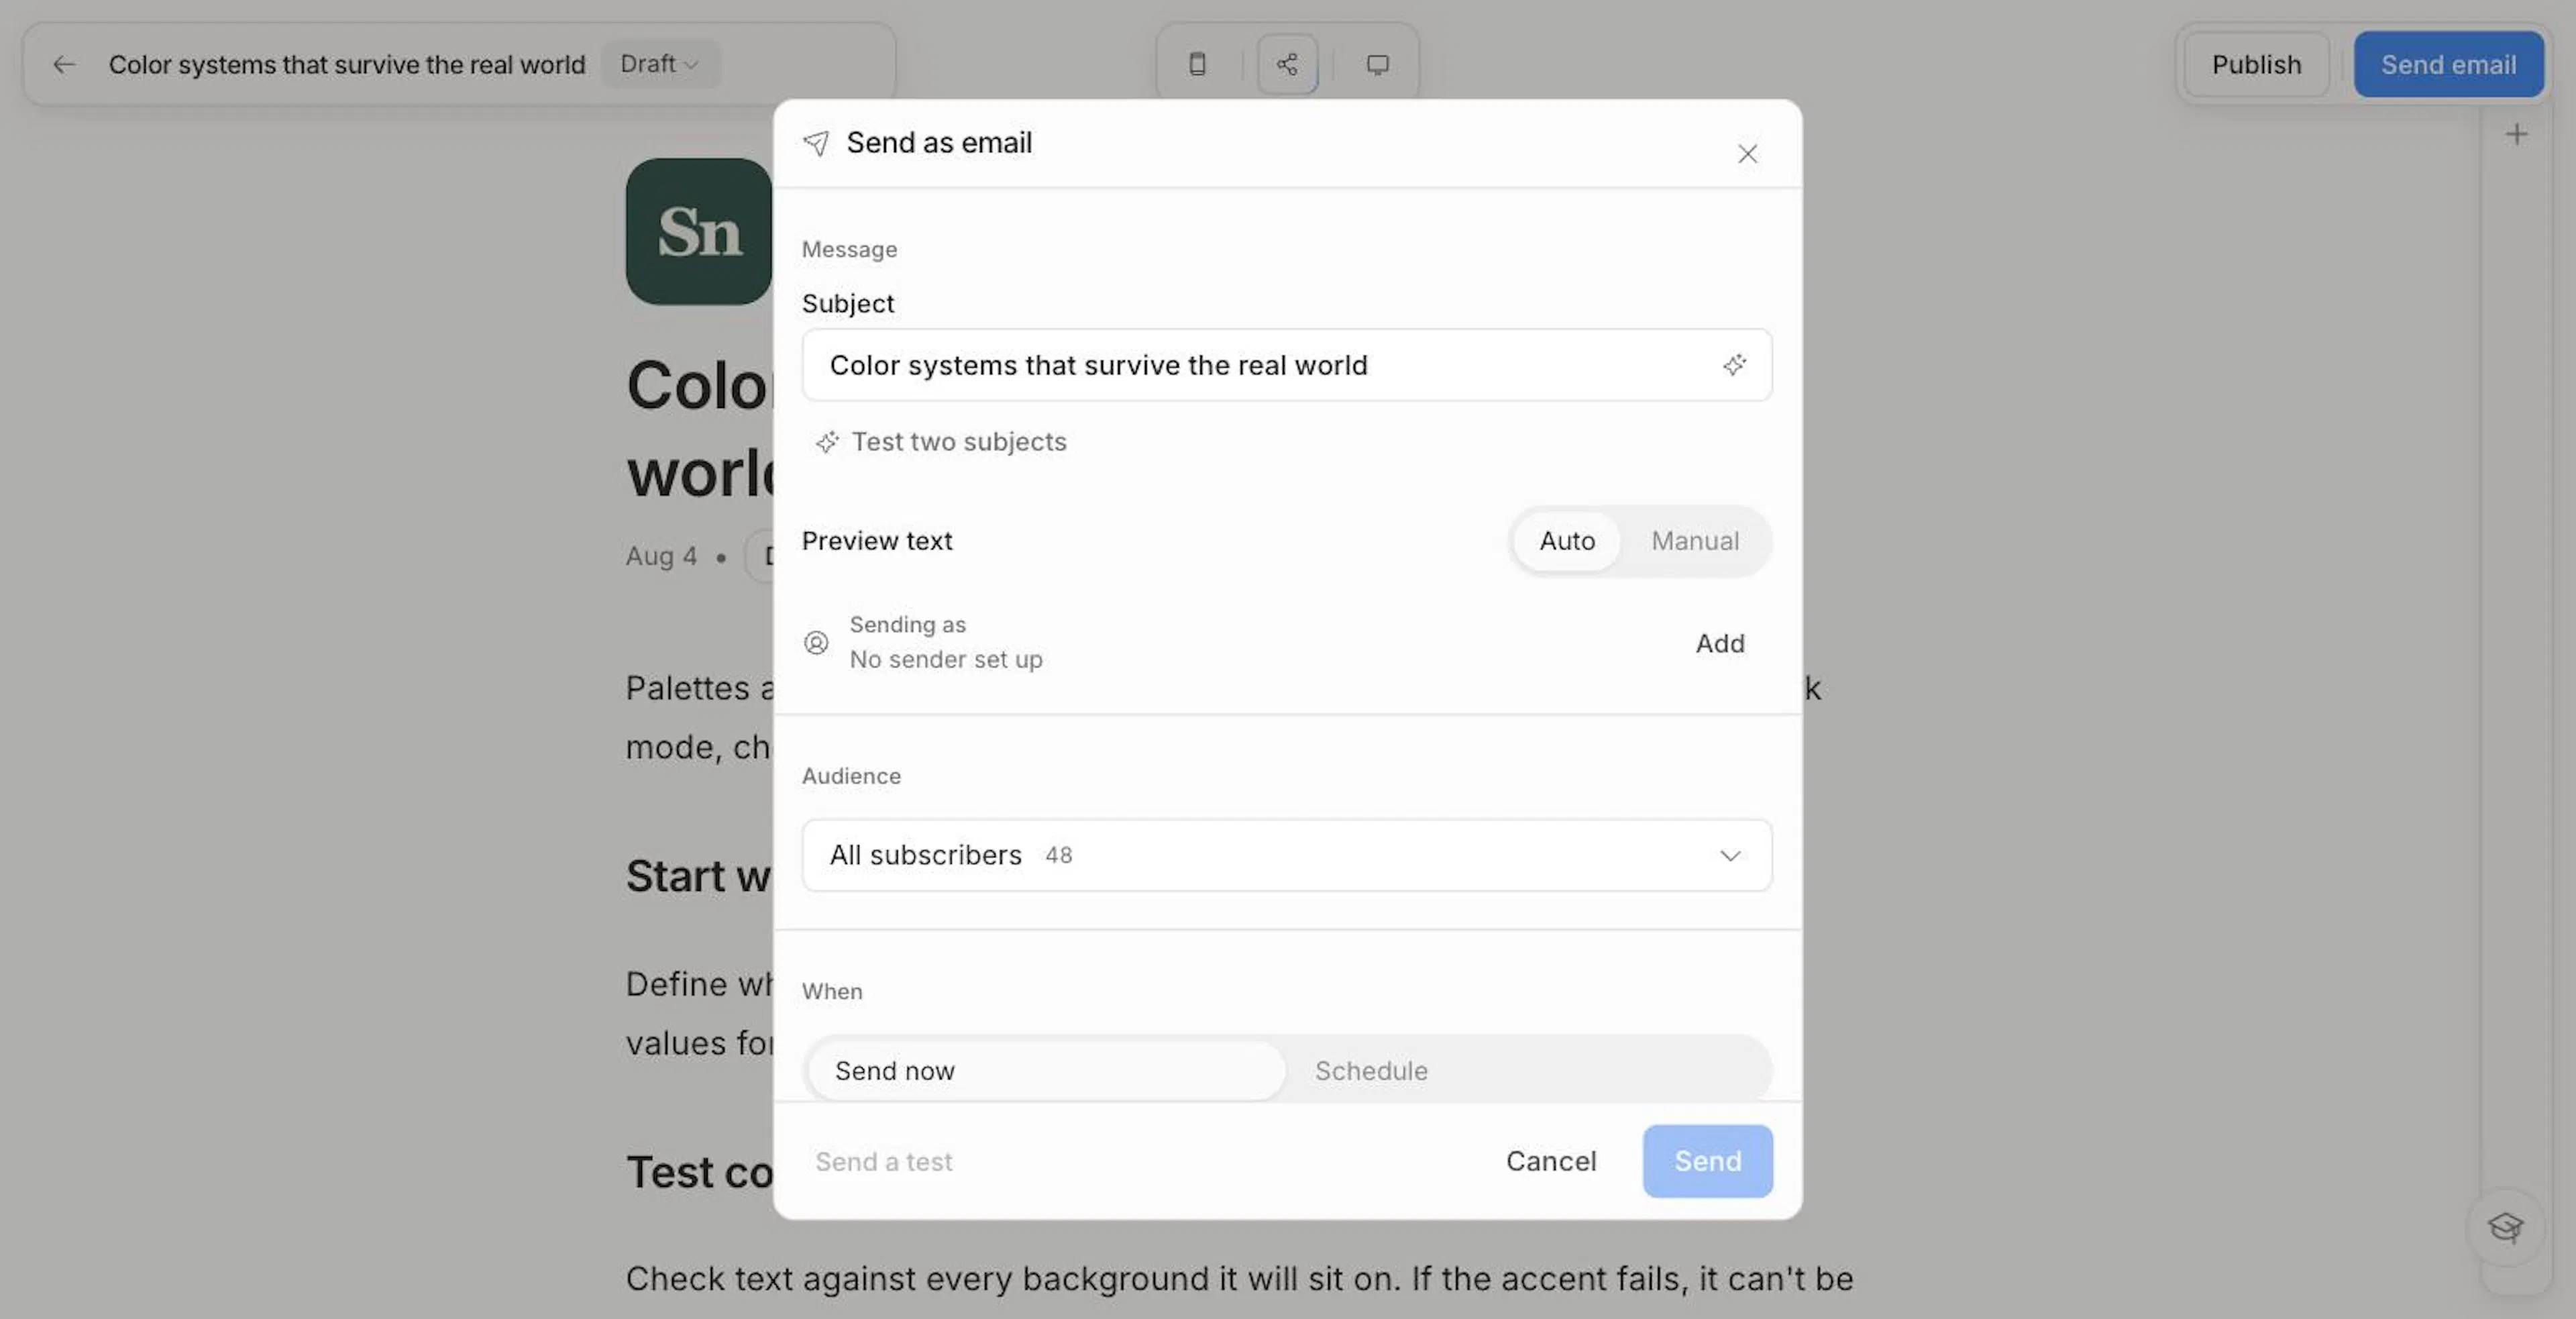
Write your subject
The subject starts as your post's title. Rewrite it, or click the sparkle to have AI Suggest a subject. A counter appears as you get close to 60 characters, a good ceiling for most inboxes.
Set the preview text
Preview text is the line inboxes show next to the subject. Leave it on Auto to let the inbox use your email's opening line, or switch to Manual to write your own.
Check who it's from
Sending as shows your sender: the name and address recipients will see. Click Edit to change it, or Add if you haven't set one up, without leaving the dialog. See Your sender.
Choose your audience
All subscribers, or a saved segment. Each option shows how many people it reaches.
Send now or schedule
Pick Send now, or Schedule and choose a time. Shortcuts cover Tomorrow, 9:00 AM and the next Monday. Once Nashra knows when your readers tend to open, a Recommended time shows first.
Confirm
Click Send (or Schedule) to see Ready to send?, a summary of who it's to, who it's from, the subject, preview text, and timing. Click Send now or Schedule send to commit. Changed your mind? Go back.
Once it's on its way, the dialog offers Share on social media so you can announce the post while it lands. See Sharing on social media.
A new sender's first campaign may be held for a quick one-time review. The dialog says Your campaign is being reviewed, and you'll get an email as soon as it's approved, usually within a few hours. This is routine, not a sign something's wrong.
The dialog also warns you before you send when:
- A button has no link. Buttons without a link send as plain text.
- You've hit your monthly send limit. It shows how many emails you've sent against your plan's limit and the date your quota resets (the 1st of next month). Upgrade to send more before then.
- Your list is over your plan's subscriber limit. Before the dialog opens, Nashra shows Subscriber limit reached with your count and your plan's limit. Upgrade with Upgrade plan, or remove people you no longer email.
- Your sending reputation needs attention. If your bounce or complaint rate is elevated, the confirm step says so. If account health is critical, sending is paused. See Sending health.
Choosing your audience
- All subscribers — Everyone who can receive email.
- A segment — A saved group based on tags, custom fields, behavior, or a smart segment template (Loyal Readers, Fresh Subscribers, and so on). See Audience.
If some people in the audience can't be emailed, the dialog shows the real number of recipients below the picker.
Targeted sends to specific segments typically lead to higher open rates than sending to your entire list.
Testing subject lines
Nashra can find out which subject line works best before your whole list sees it. Only the subject is tested. The email itself is identical for everyone.
Under the subject, click Test two subjects. Write two variants, or click Add variant for a third. Each variant has its own AI suggestion button, and every variant has to be different. When you send:
- 30% of your audience gets the test, split across the variants.
- After 4 hours, Nashra picks the subject with the best open rate.
- The winner goes to everyone else automatically.
Click Single subject to turn the test off. Each variant's results show in the post's email report. See Insights.
Subject line and preview text tips
Subject line tips:
- Keep it under 60 characters so it isn't cut off
- Be clear about what the email contains
- Avoid clickbait. It erodes trust over time
Preview text tips:
- Expand on the subject instead of repeating it
- Keep it under 100 characters
Your sender
Your sender is the "from" name and address subscribers see, plus where their replies go. Each person on your team has their own, so an email you send goes out as you, and a teammate's goes out as them.
- Change it from the Sending as row in the send dialog, or in Settings → Account.
- Send from your own domain, like
newsletter@yourdomain.com, once you've connected one. Until then, emails go from Nashra's shared domain,shared.nashramail.com, and replies go to the reply-to address you set.
See Your sender for the details, and Sending Domain to connect your own domain.
Test emails
Check a real inbox before the real send. In the send dialog, click Send a test, pick the address to send it to, and click Send test.
The test goes out from your sender, with your subject and preview text, exactly as recipients will see it. For an A/B test, it uses the first variant. Tests can go to your own address or a teammate's. See Team to add teammates.
Scheduling and cancelling
Choose Schedule in the send dialog to pick a future date and time. Times are in your workspace's timezone, shown under the picker.
To cancel, open the post and click Send email. The dialog shows Email already scheduled with the date and time. Click Cancel there. The post itself is untouched.
Sending a post again
Open the post and click Send email again to send it to another segment. The dialog shows when it was Last sent, with View analytics for the earlier send. Each send is its own campaign, and the post's report lets you switch between them.
Resending to non-openers
A resend is a second chance for the people who didn't open the first time. It's a separate post, so you can give it a fresh subject line or tighten the intro without touching the original.
Create the resend
In the Library, open a sent post's ⋯ menu and choose Resend to non-openers. Nashra creates a copy named after the original with "(Resend)" and opens it.
Adjust it
Change the subject or the content if you like. The resend sits under the original post in the Library.
Send it
Click Send email. The audience is locked to Non-openers of the original post.
Each post can have one resend, and a resend can be sent once. Resending too often can hurt your sender reputation, so save it for the emails that matter.
What your email looks like
Every email opens with a clean masthead in the same design language as your Hub: your logo, the post's title, then one quiet line with the date, the post's category, and Read online (shown only if the post is published on the web).
- The date is the day it's delivered. A scheduled send shows the day it goes out, and an automation shows the day each subscriber receives it, not the day you last edited the draft.
- Automated emails get preview text too. Automations and resource follow-ups take their preview text from the post's summary or first paragraph, so the inbox shows a real sentence instead of your logo and title.
- Hide what you don't need. In the editor, hover the logo or the date line and click to hide it from the email.
- Arabic keeps its typeface. Arabic emails carry Nashra's Arabic typeface in Apple Mail, iOS Mail, Samsung Mail, and Thunderbird. Gmail and Outlook fall back to a carefully matched system font.
On a larger screen, click Mobile preview in the editor's top bar to see the email version as it renders on a phone.
Removing Nashra branding
On the Free plan, emails end with a small "Built by Nashra" badge. On the Newsletter and Publisher plans it's removed from your emails automatically. Publisher also removes branding from your Publishing Home. See Plans & Billing.
Sending safeguards
Nashra includes built-in protections:
- Bounce handling — Bouncing addresses are tracked and suppressed automatically.
- Complaint handling — If a subscriber marks your email as spam, they're suppressed and the complaint is logged.
- Delivery monitoring — Bounce and complaint rates are watched continuously. If they run high, Settings → Domains shows a Sending health warning. See Sending health.
- Rate management — Emails are paced to protect your domain's reputation with inbox providers.